How to lay terracotta tiles on an interior or exterior concrete floor
Starting your DIY or renovations ?
How to lay terracotta tiles on an interior or exterior concrete floor
1. Prepare and Clean the Concrete
Once you have chosen the terracotta tile that is suitable for exterior use, it is essential to have a clean surface for a proper bond. It is recommended to clean the concrete with warm water and a suitable product such as a trisodium phosphate. Scrub well with a stiff brush and rinse well. If the concrete was previously sealed you will need to grind down the surface so the tile adhesives will bond. A scarifying machine may need to be rented to grind down the surface.
2. Repair any existing cracked steps or concrete
If there are any cracks or surface damage ( large chips, or stairs with cracks running through them ) these will need to be simply repaired using a crack isolation membrane. Cut to size to ensure all damaged areas are covered, trowel thin-set onto the concrete filling any damaged area and push the membrane onto the thin-set smoothing it with the trowel.
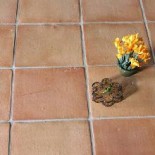
3. Dry-Lay the terracotta tiles
The terracotta tiles need to be washed down and allowed to completely dry either before or after Dry-laying but before sealing.
Dry-Lay all the terracotta tiles to plan the layout patterns and prepare for specials cuts that may be needed. Stack the tiles ahead of the laying area so you can work for longer stretches.
4. Laying the terracotta tiles
Mix a thin-set mortar following the directions on the packet. Using a trowel apply the thin-set and the comb edge to create the grooves this will give the best adhesion to the terracotta. Place the tiles by gently sliding into place using 10mm spacers for consistent spacing.
Note: When laying our Stoneware or Machine tiles the lines on the underside of the tiles should follow the same direction.
Your base should already have a minimum of 1% run-off for rain water.
If tiling steps start with the risers. Let the mortar cure overnight before grouting.
Note: Remove any mortar that may have accidentally got on the terracotta tile surface immediately with water and sponge.
Enjoy your floor for many years and be the envy of your friends!!
Need Help Choosing The Right Terracotta Sealer?
Choosing the correct sealer is one of the most important decisions when restoring a terracotta floor. Different sealers can produce very different results in appearance, maintenance requirements and long-term protection.
Rather than relying on generic advice, our detailed restoration guides explain the advantages and disadvantages of traditional finishes, breathable sealers and modern protection systems.
Learn how to restore, grout and protect terracotta floors correctly using our professional digital guides.
Visit The Terracotta Restoration Centre → HERE


